Configuring Emlid Reach RS3 and 12d Field
To get up and running – the guide follows these key steps.
- Configure Emlid Reach RS3 using Emlid Flow to stream NMEA
- Connect the receiver to Windows PC over Bluetooth
- Configure 12d Field to connect to the Emlid receiver
- Configure 12d Field to use tilt corrections
… based on the following software & firmware versions:
- Emlid Reach Firmware version 32
- Emlid Flow App version 10.9
- 12d Field version 15 C1p
Watch the video, or follow the steps with screenshots below.
A PDF is available for download – enter your details at the bottom of this document.
Configure Emlid Reach using Emlid Flow to stream NMEA
For the best performance, 12d software benefits from position streaming rates using NMEA to be at least 5Hz – preferably 10Hz. In order to output at 10Hz, the GNSS update rate needs to be 10Hz.
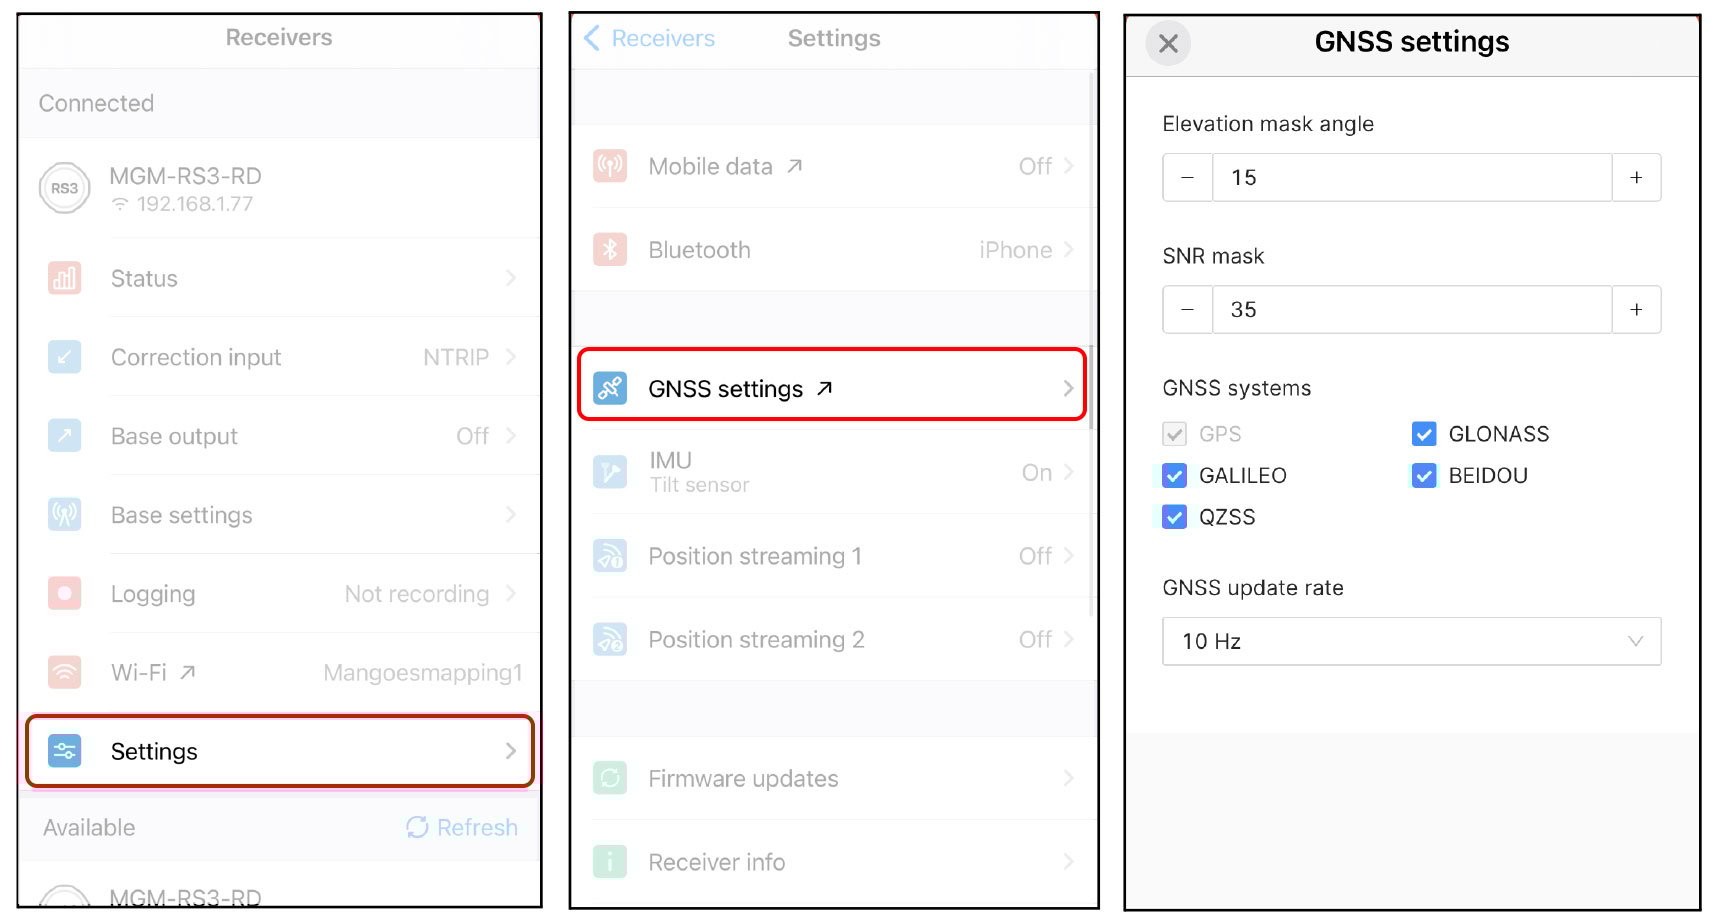
Step 1 – Open Emlid Flow, connect to the receiver
Go to Settings > GNSS settings
Set the GNSS update rate to 10Hz
Step 2 – Set Position streaming settings
Go to Settings > Position streaming 1 > Bluetooth
In Bluetooth, set Format to NMEA
NMEA settings should be configured to:
- Do not compensate receiver position
- Talker ID – set to GN
- GGA and GST set to 10Hz
- GSA and GSV set to 0.5Hz
- RMC, VTG, ZDA and EMP turned off.

Step 3 – Enable Reach RS3 to be found as a Bluetooth device by the Windows tablet
Go to Settings > Bluetooth > Discoverability > On

Connect to the receiver on Windows
Step 4 – Add a new bluetooth device on Windows in the Bluetooth & other devices menu
Select the Reach device from the list to pair it to your computer.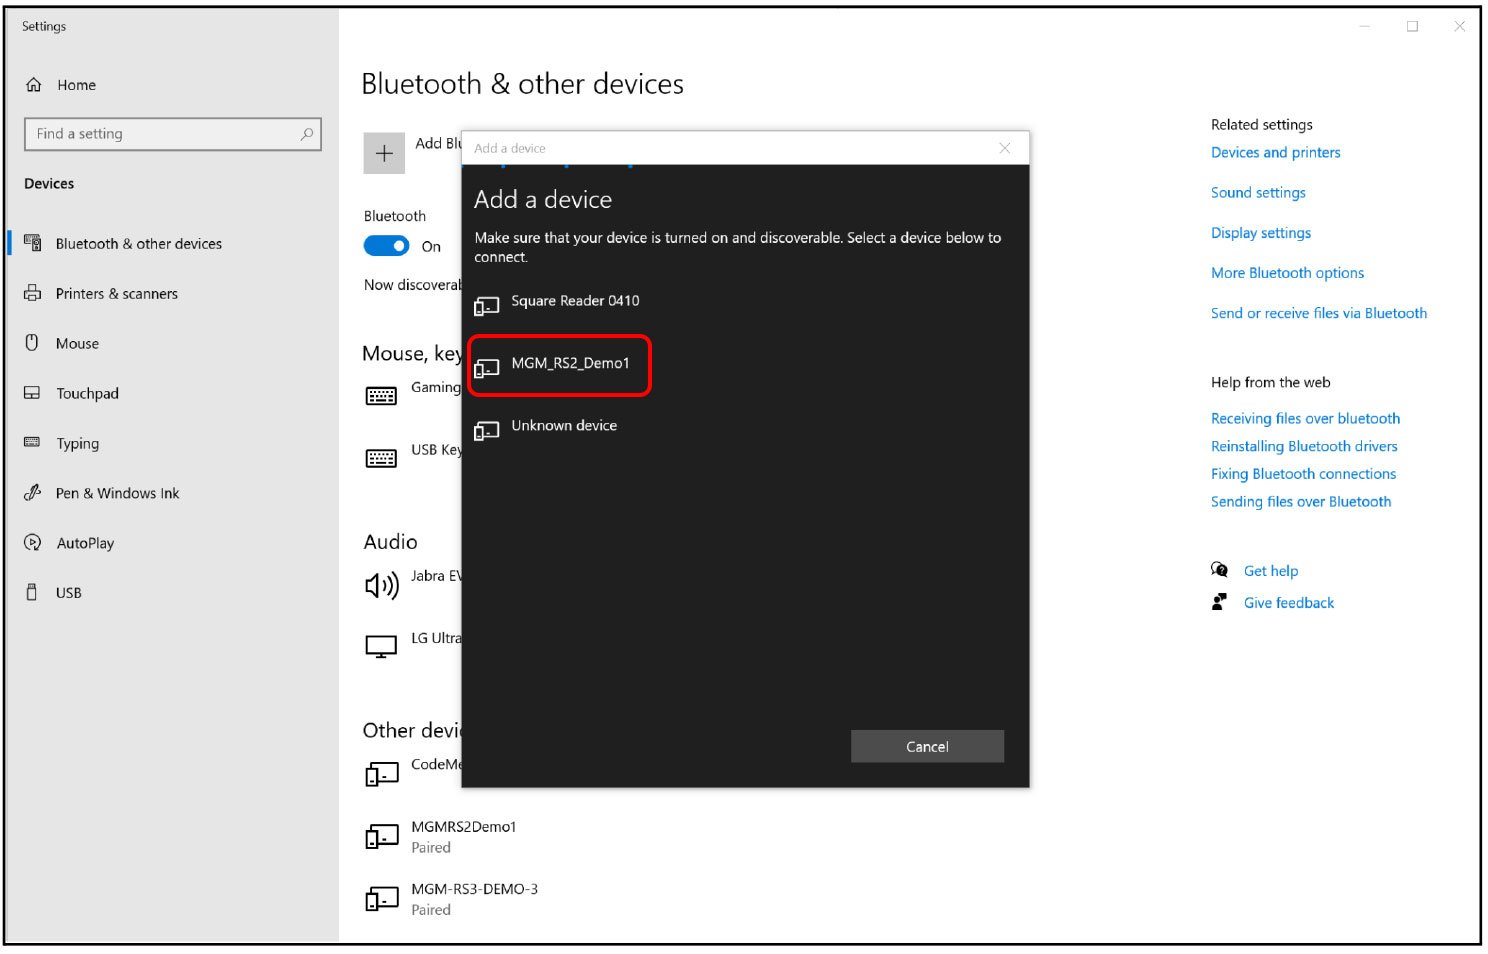
Configure 12d Field to talk to the Emlid receiver
Step 5 – Download the installer file
Install 12d Field 15 C1p or later, which has the Emlid driver built in.
https://downloads.12dmodel.com/V15/12d_Model_15_C1p/12d_Model_15_C1p_64_Setup.exe
Step 6 – Configure N values and Projection
Using the following guide – ensure you select the correct zone with the projection you are using https://12dwiki.com.au/12df-using-a-gsb-for-n_values-instead-of-winter-files-and-tdf_hel/
Step 7 – Configure 12d to use Emlid GNSS
A. Open 12d Field from within 12d Model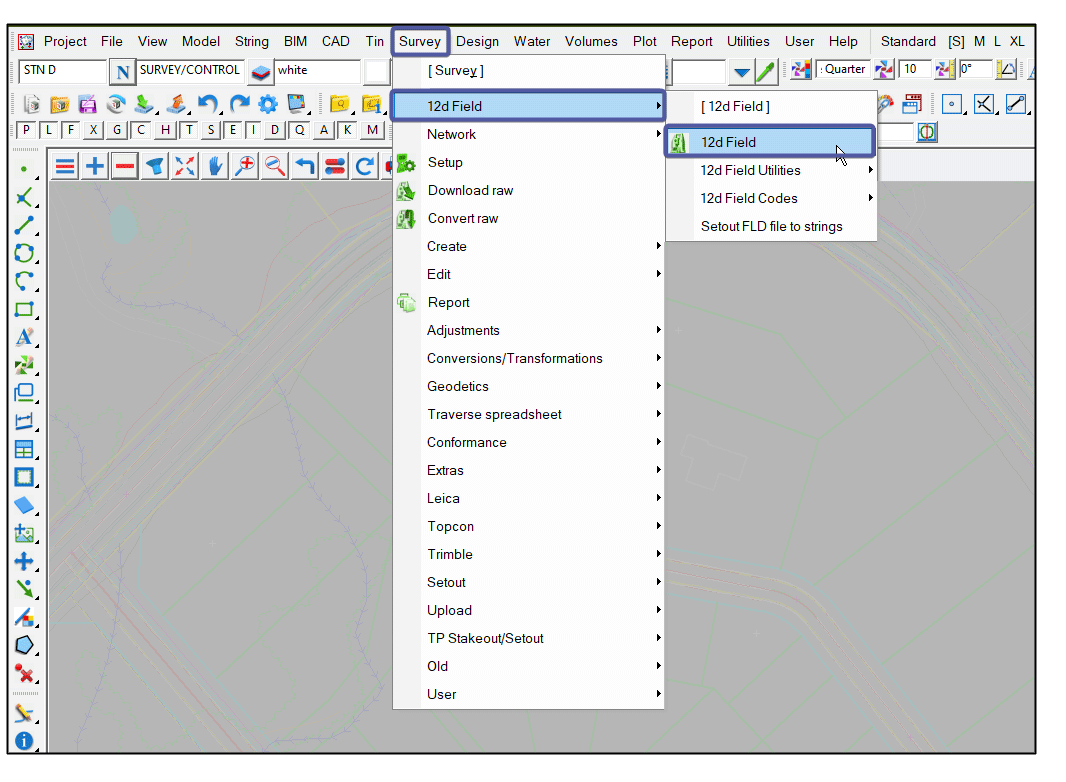
B. Change the setup

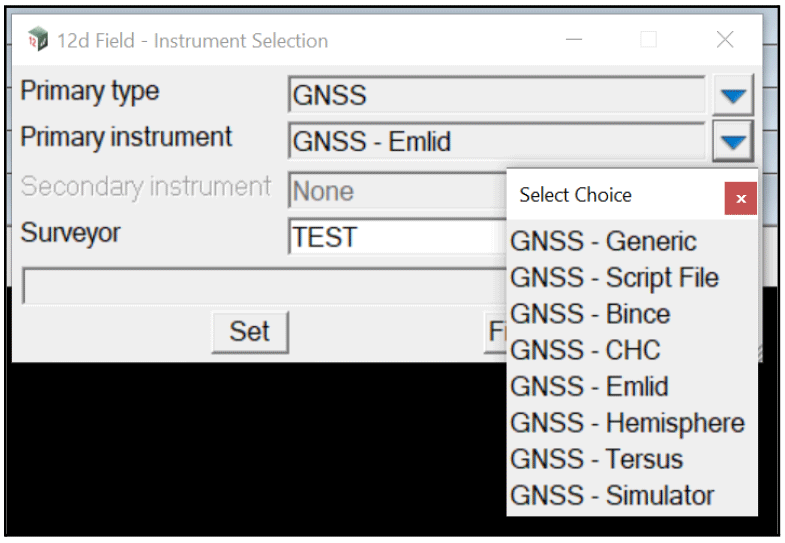
C. Instrument selection
Primary type: GNSS
Primary instrument: select GNSS-Emlid
Choose: Set to keep the settings
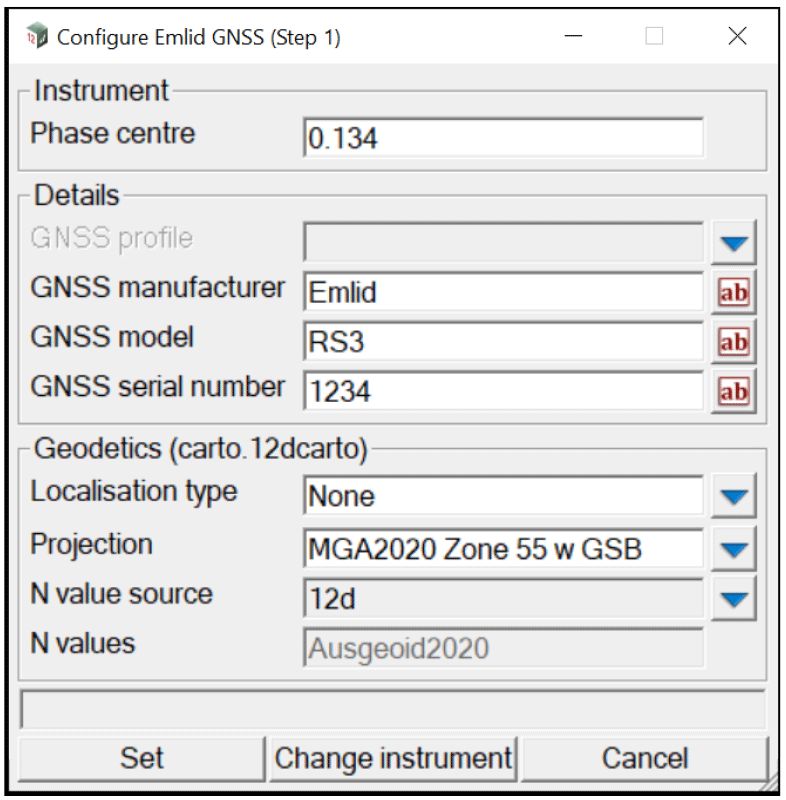
D. For Phase centre use 134mm (0.134) for the RS3
In Geodetics section
– Localisation type: None
– Projection: Use the custom projection defined in step 6 above.
– N value source: 12d
Choose: Set to keep the settings
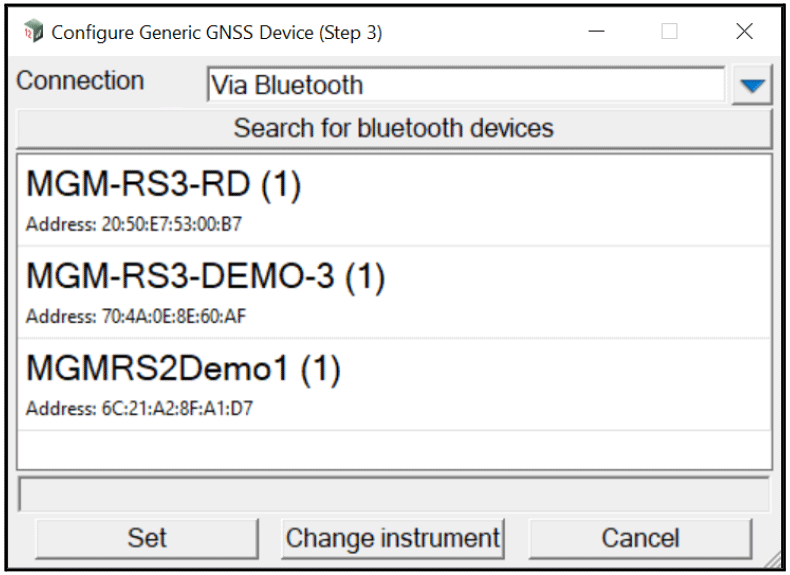 E. Select the correct device from the list of Bluetooth devices.
Click “Search for bluetooth devices” if it does not
appear – this can take a while.
When search is complete, Select the Reach RS3
from the list of Bluetooth devices and
choose Set to keep the settings.

F. The Testing Connectivity screen will appear.
If successful, a check box will appear against
each stage of the test.
The GNSS status window should appear – Green confirms the setup is working correctly.

 Step 8 – Use tilt corrections
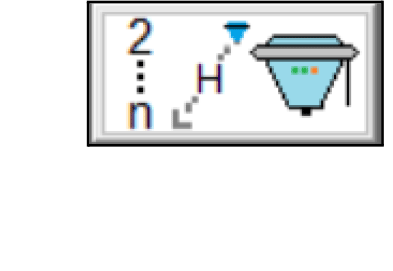
Press the button to configure tilt.
From the Tilt dropdown select Use tilt corrections.

Step 9 – Check status
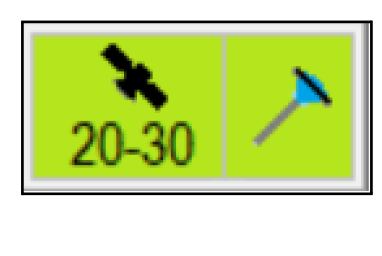 Press GNSS status button to check the status of the solution, position and tilt corrections.
The three tabs show Status, Position and Tilts information

Check, check and check again
Now you are receiving NMEA strings from Emlid Flow and you should be able to get a FIX solution in 12d Field. We need to confirm if the Phase Centre Offset and Geoid-Ellipsoid separation values are being applied properly, and if the tilt is working.
Step 10 – Check against high quality PSM
Go to a nearby permanent mark with a high quality horizontal and vertical position and do some checks. Record an observation from within Emlid Flow, ensuring you have the correct Geoid selected.
Do the same within 12d and compare the coordinates – are they close to each other? Are they close to the published coordinates for the mark?
Happy 12d Fielding!
Read more about this great tool on 12d’s website:
https://www.12d.com/product/12d_model_12d_field.html
We’ll have a video of this process out soon. If you’d like to know more about this equipment and software, contact the sales team: [email protected]
PDF Download
Would you like a copy of the guide as a PDF? Please enter your details below for the file link.
To save a copy of the PDF, right click and choose to save locally.